
Short answer
Choose a small, distinctive image and limit the search to the part of the screen where it belongs. Test once with the image visible and once with it absent.
Image detection reads visible pixels. It does not understand what a button means or prove that the app behind it is ready.
This guide covers Osenpa Auto Clicker. Check requirements and download options before you begin.
On this page
When to use this method
For a simple test, display a small, distinctive picture in a visible window and keep the same picture as a file. You will show it for one test and hide it for another. Save your existing workflow before testing this condition, and keep F12 available.
Use a visual condition when you need to wait for something on screen. A fixed click is enough when the target stays in one place; image detection helps when a visible shape is the signal.
Choose image detection or color detection
Use an image for a recognizable shape, icon or label. Use color detection for a pixel or small color group. For a changing number or clock, follow the Counter Reader guide instead.
Build your first image condition
-
1. Choose a distinctive target
Put one harmless, distinctive image in a test window. Use a small icon or label that does not move or change. Avoid clocks, animation, cursors and changing text.
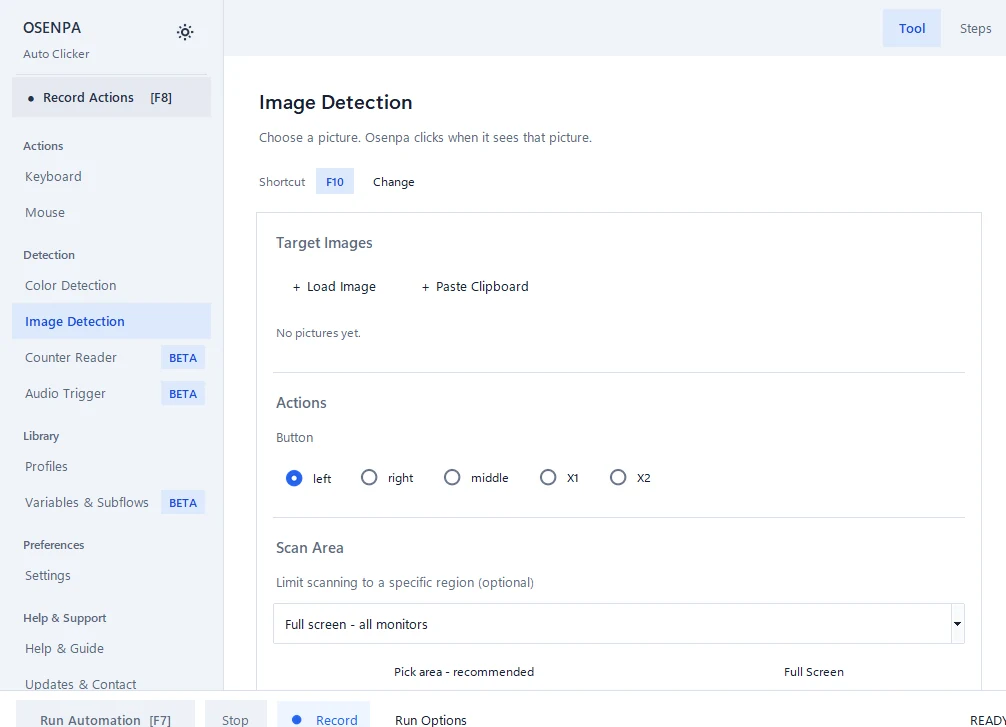
Keep the target visible while you choose the image and search area. -
2. Add the target image
Open Image Detection. Choose Load Image for a saved image or Paste Clipboard for a copied image. You should see a preview of the same image in the target list.
-
3. Select a small search area
Choose a rectangle that contains the target and little else. You should see the selected area outlined on the visible screen. Keep the test window open and in the same place.
-
4. Keep the first match simple
Use one target at its normal size and color. Keep the default confidence and match mode for the first test. Choose Best match if the target can appear more than once.
-
5. Add a finite timeout
Expand IF / THEN / ELSE - Condition Step. Choose Timeout, put Wait (delay) in THEN and Stop automation in ELSE, then select Add Condition Step. In Steps, keep only this condition enabled and set Run Options to one cycle. A finite timeout lets you test both the found and not-found results.
-
6. Test with the image visible
Keep the target inside the selected area and use Run Automation in Steps. The THEN delay should complete. Use this workflow for the condition test: Image Detection's separate Run Once button tests its direct image-click action.
-
7. Test with the image absent
Hide the target or move it outside the selected area. Run the condition again. You should see the timeout finish and the ELSE action run. No old target position should be reused.
Image and color matchingHow a fresh match controls the chosen branch and when to recapture a target.
- How it works
- A workflow can use one or more image or color targets, wait for appearance or disappearance and run a chosen action only from a fresh verified match.
- Important limit
- When a button changes size, theme or animation state, capture a new template before replay because the saved pixels no longer describe the target.
Advanced matching choicesScale, color, multiple targets and wait behavior.
Use a scale range only when the same target actually changes size. Appearance emphasizes the full look, Outline emphasizes shape and Hybrid combines both. Grayscale can help when color is irrelevant. Confidence controls how close a result must be.
With several targets, choose whether any one is enough or all must be present in the same scan. If several matches exist, select the first, best, nearest or a specific numbered match. Use disappearance only when the target leaving the screen is the real signal.
A single scan checks once. Timeout keeps checking until the set time ends. Until found has no finite no-match result for ELSE. A click on a found image uses the fresh verified position. A failed or disappearance result clears the old position instead of reusing it.
Input Variation can add a pause after a completed action. It does not change the selected image, match position, detection settings or timeout.
Compare the two test results
With the picture visible, the condition should take THEN. With it hidden, the timeout should end in ELSE. If both runs behave the same way, correct the target or search area before adding an action that changes anything.
If a match is missed or points to the wrong place
Stop with F12 before adjusting the target. Check that the loaded preview matches the visible image at the same scale and theme, then select the search area again. If several similar images are visible, tighten the area and check the match selector before changing Confidence.
A screen-capture error is not proof that an image disappeared. Read the error, restore the visible screen source and repeat both the visible and absent tests. Keep the THEN action at Wait (delay) until those tests select the intended branches.
Check the picture and its surroundings
- Match the screenshot to the current display scale, theme and button state.
- Keep the search area over the intended window.
- If similar targets appear more than once, check which match is selected.
Detection checks
- Test one expected match and one expected non-match.
- Confirm the action targets the intended window.
- Test a timeout or ELSE path without clicking stale coordinates.
- Keep F12 available as the permanent Emergency Stop.