
Short answer
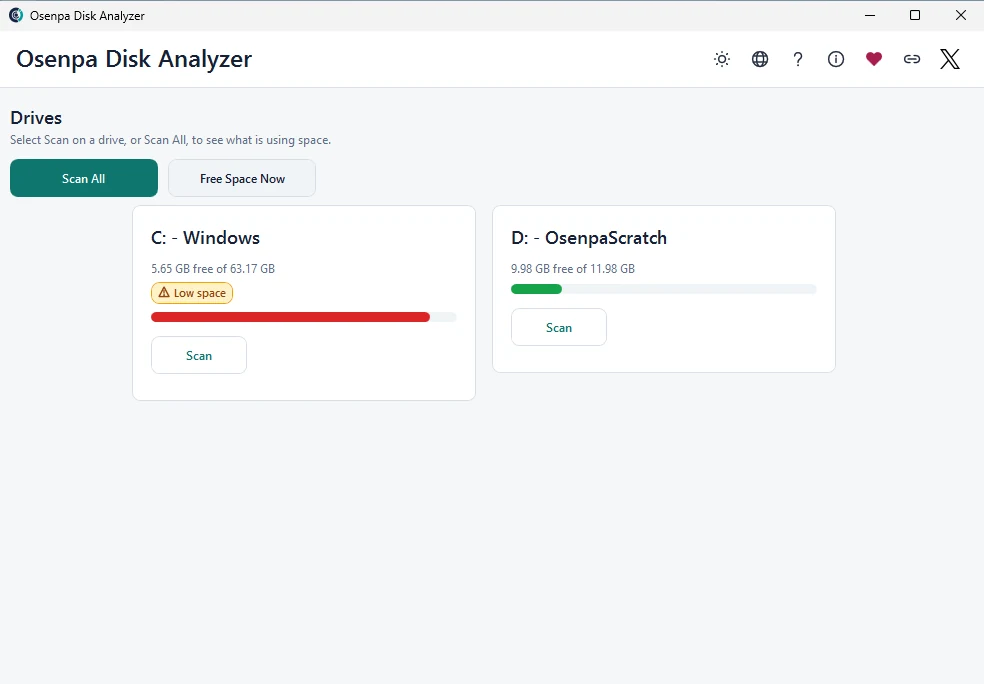
Connect every drive and check its label and capacity. Choose Scan All, then keep the drives connected until every one finishes.
The previous result tabs are kept while the new set is prepared. Cancellation or a failed scan leaves them in place. A disconnected or unreadable drive can instead finish with partial coverage, so check every new tab for warnings before relying on it.
This guide covers Osenpa Disk Analyzer. Check requirements and download options before you begin.
On this page
When to use this method
Use this method when you want one current result for several fixed or removable drives without mixing old and unfinished data.
Before you start
Connect every drive. Write down each label and capacity. Keep portable devices powered. Scan checks one drive; Scan All checks the current set as one operation.
Multi-drive scan behavior How results are committed and what to check after a drive changes.
- How Scan All works
- Scan All prepares the ready drives as one set and replaces the previous tabs after each scan returns a result. Cancellation or a failed operation leaves the previous tabs intact. A returned result can still be partial: completion does not prove that every drive was fully readable.
- Important limit
- Two USB drives can both appear as E: at different times. Capacity and volume identity must match before comparing results; a later device needs a fresh scan.
Do not identify a USB drive by its letter alone
Two drives can use the same letter at different times. Labels and capacities help you recognize them but are not unique identifiers; identical devices can share both. Keep the intended device connected, refresh the drive list after a swap, and create a fresh scan before comparing or acting on its contents.
Scan each drive and check its result
-
Check the drive list
Record each drive letter, label, and capacity. You should see every expected drive before starting.
-
Choose Scan All
Choose Scan All to scan the ready drives in one operation. Drives are scanned one after another, not captured at one instant. Choose one drive when troubleshooting it.
-
Leave the drives connected
Do not remove, reconnect, or rename a drive while scanning. Wait until result preparation finishes.
-
Check the result tabs
When every drive finishes, you should see new per-drive tabs for the full set. Read any partial, access, protection or skipped-item warnings on each tab. If Scan All is canceled or fails, the previous tabs remain; a drive that returns partial coverage can still appear in the new set.
-
Refresh after a hardware change
Refresh the drive list after adding, removing, or replacing a device. Check its label and capacity, then start a new scan.
What can make a drive result incomplete
- Swapping devices that reuse one drive letter
- Assuming a canceled Scan All partly updated the tabs
- Assuming a disconnected drive must stop the operation instead of returning a partial result
- Comparing inventories without volume labels
Checkpoint: confirm every drive finished
- Write down each volume label and capacity.
- Keep devices attached through result preparation.
- Confirm the new drive set replaced the previous tabs, then review every tab for incomplete coverage.
- Refresh and rescan after any hardware change.