
Short answer
Add the page photo to Fix Documents (BETA). Check that all four page corners are inside the crop.
Compare Original and Cleaned, then choose Create PDF. The app corrects the pages and automatically adds searchable text using your installed OCR languages. Check the finished copy before sharing it.
This guide covers Osenpa PDF Tools. Check requirements and download options before you begin.
On this page
When to use Fix Documents
Use this workflow for photographed books, forms and paper documents when the page is not square to the camera, bends near an edge or spine, or has distracting shadows and uneven light. It corrects the page image and, for PDF output, adds searchable text before saving the finished copy.
Technical noteConfirmed behavior and an important limit.
- What we confirmed
- Document processing stays on the PC. The correction model and OCR language packs are optional components downloaded only when requested and verified before use.
- Important limit
- Fix Documents is a BETA feature. It cannot restore detail hidden by glare, motion blur, missing page edges or an incomplete photo, so every result needs a visual check.
What each correction does
Rotation turns the whole page upright. Perspective correction squares a page photographed at an angle. Page flattening reduces curves in a photographed book or bent sheet. Shadow and lighting correction evens the visible page. OCR reads the page image and adds a text layer so you can search and copy words. Create PDF runs it automatically after correction; it does not repair missing or blurred detail.
What you need before you start
- An untouched copy of the photo or scanned PDF
- A photo with all four page corners visible
- Even light with as little glare or motion blur as possible
- The intended page order when you add more than one input
- At least one OCR language pack installed in Settings; install the languages used on your pages before creating a PDF
Supported input includes JPG, JPEG, PNG, BMP, TIF, TIFF, WebP, HEIC, HEIF, and scanned PDF.
Check faint detail before OCR
The cleaned A4 PDF is a new page image. Compare faint pencil marks, stamps, signatures and all margins with the original at a readable zoom. A neater-looking page is not a useful result if a meaningful mark has disappeared. Keep the original and adjust the crop or take another photograph when needed.
Correct the photographed page
-
Add the original
Open Fix Documents (BETA). If the correction component is missing, use its offered installation action and wait for it to be ready; installation needs internet access. Add the photographed pages and arrange them in the intended PDF order.
You should see: each source once, in the order the finished document should use.
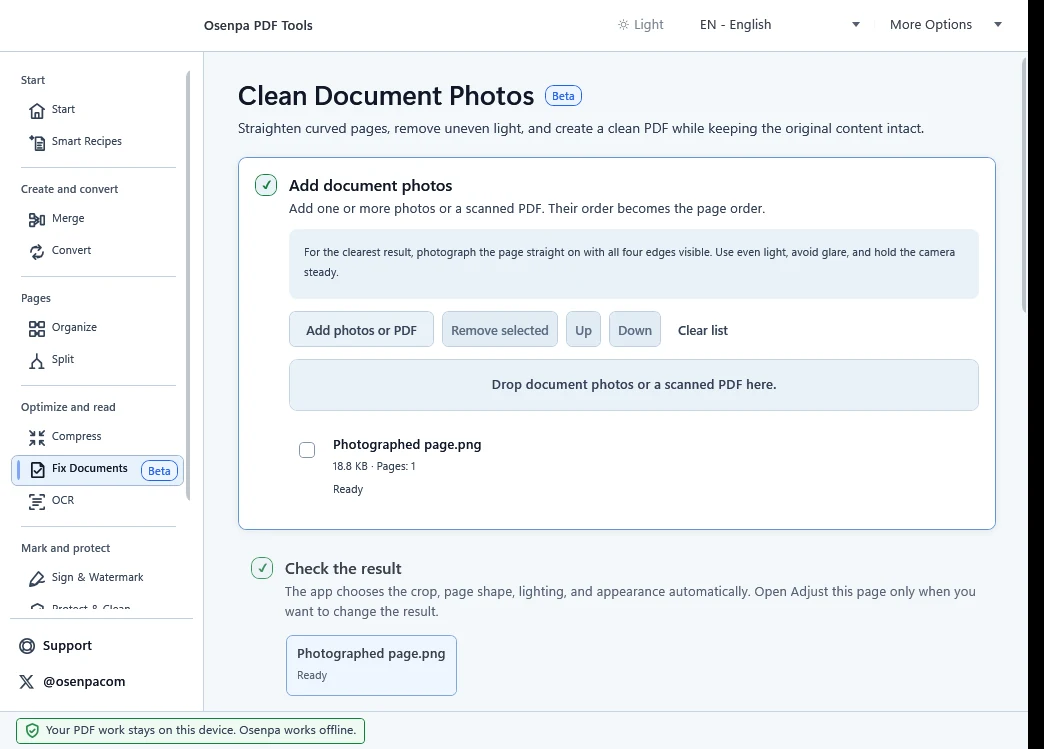
Add every source before correcting individual pages. The list order becomes the finished PDF page order. -
Check the page boundary
Open Adjust this page. Choose Keep as one page or Split into two pages. Use Find edges again, or move the four crop corners and adjust rotation and appearance yourself.
You should see: the complete page inside the boundary with no neighboring page fragment.
-
Compare both previews
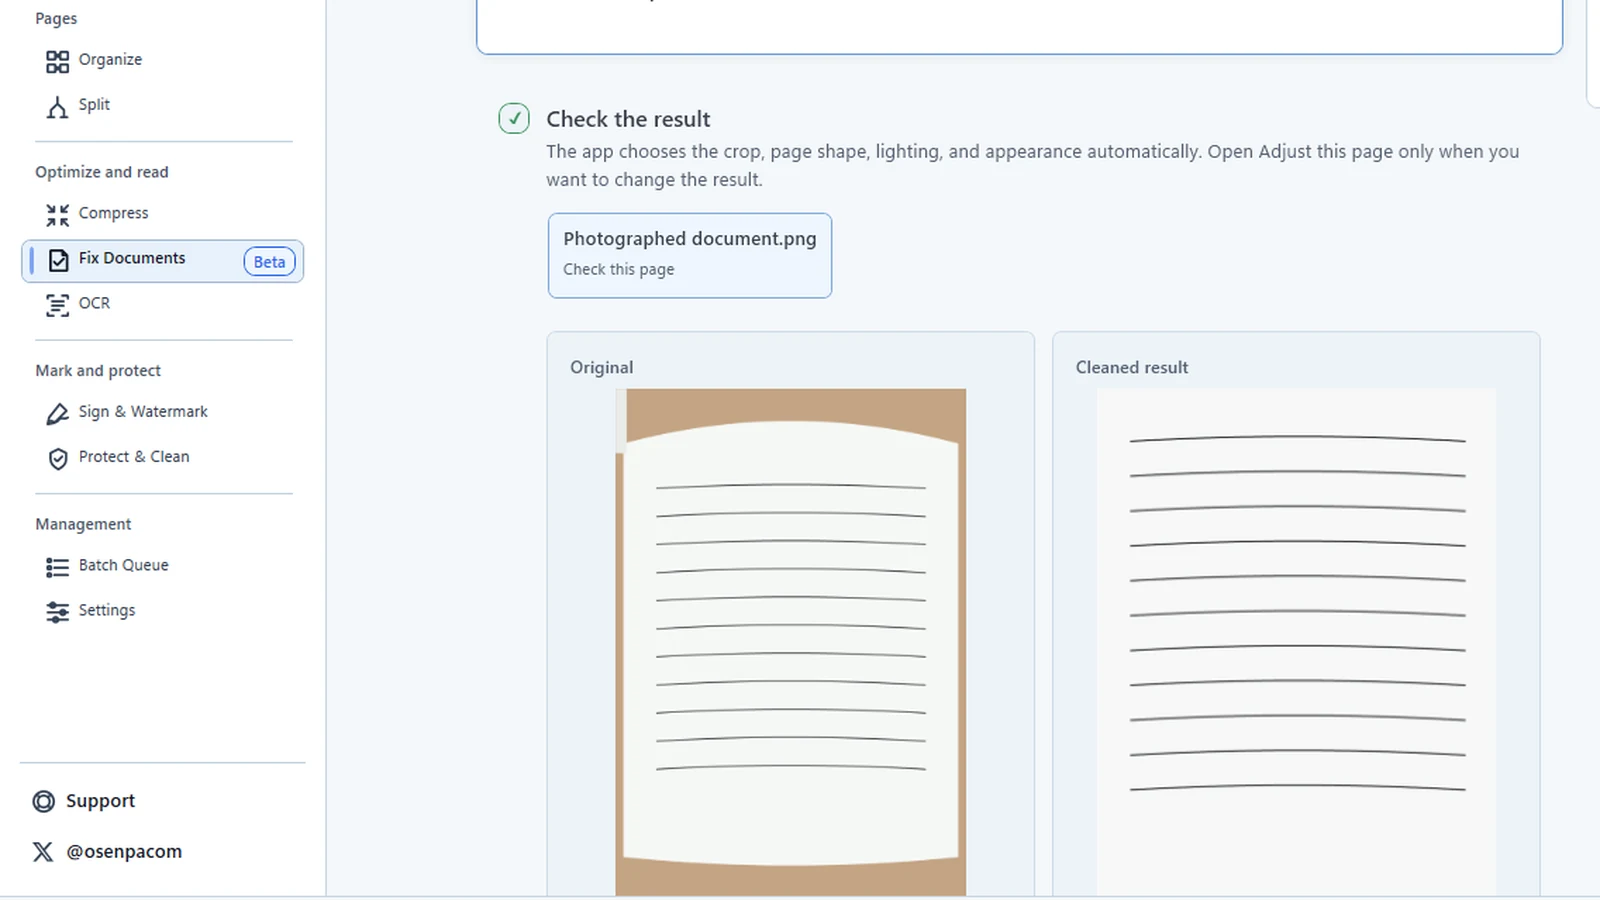
Review Original and Cleaned. Drag to pan and zoom around the cursor to inspect corners, text, curves, shadows and lighting.
You should see: straighter edges and more even lighting without missing text or margins.
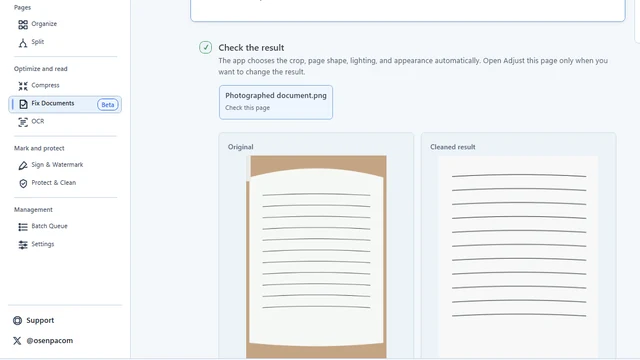
Compare the complete page, edges, text and margins in both previews. If the cleaned copy loses important detail, return to Adjust this page or keep the original. -
Create a clean copy
Choose the output folder and filename, keep PDF as the output and select Create PDF. The app chooses A4 portrait or landscape from each corrected page's proportions; there is no manual A4 orientation selector here. Wait through correction and automatic text recognition, then open the new file.
Watch the current stage and elapsed time instead of expecting a reliable finishing-time estimate. Use Cancel if you need to stop. A canceled or failed PDF job is not a finished document; read the result message before trying again.
Check the automatically recognized text
For PDF output, Fix Documents automatically chooses from the OCR language packs already installed on this PC. It needs at least one installed language pack; it does not require all 16. If the app asks for a pack, open Settings and install the language used by the document, then retry. Downloads need internet access; recognition runs locally.
The app checks every page before saving the finished searchable PDF. If it asks you to check a page boundary, rotation or recognized text, correct that page and retry. It does not save an incomplete PDF as a successful result. Once the file is ready, search for a word and copy a sentence. Compare important names, dates, numbers and small footnotes with the page image.
The separate OCR workspace is useful for other scanned files or when you want to choose a single language yourself. Its All languages option requires all 16 verified packs; that is a different requirement from Fix Documents.
If the cleaned page still looks wrong
Return to the original and check the page boundary first. If a book page is incomplete, photograph one full page with all four corners visible. If glare, blur or a hard shadow hides text, take the photo again with the camera parallel and the light spread more evenly. Correction can improve the appearance of captured detail, but it cannot recreate information that the camera missed.
Detection favors one complete page over a partly visible neighboring page. Two complete facing pages can be split into separate pages. If the boundary is unclear, the app keeps the full frame and asks you to review it.
PDF is the default output. Under Advanced options, Lossless PNG pages saves each corrected page as a separate image instead, without the automatic PDF text-recognition step.
Document photo mistakes
- Photographing the page with a corner outside the frame
- Accepting a crop that includes part of the neighboring page
- Expecting correction or OCR to recover detail hidden by glare or blur
Cleaned PDF checkpoint
- The complete page appears once and no corner, text, signature, stamp or margin is cut off.
- The page is upright, proportions look natural and the image is not stretched to fill the intended A4 orientation.
- Faint writing and shaded areas remain readable when you zoom in.
- Search and copied text in the finished PDF match the page image.
- If important detail disappeared, keep the untouched source and try a clearer photo.