
Short answer
Add a copied MOV file and choose MP4. Save the MP4 in a different folder. Check the picture, sound and duration. Play important recordings through before relying on them.
This guide covers Just Converter. Check requirements and download options before you begin.
On this page
What MOV to MP4 conversion means
MOV and MP4 are containers. They are file types that hold video, audio, and other tracks. A codec is the method used to store the picture or sound inside a container. Two MOV files can use different codecs even though both names end in .mov.
The app probes the source tracks and offers available media controls. Review before starting summarizes the job; the conversion engine can still report an unsupported stream or setting. Conversion re-encodes tracks when needed, but it cannot restore detail missing from the source.
Before you start
- Keep the original MOV and test a representative copy.
- Confirm the destination accepts MP4 and note any size or codec requirement.
- Choose a separate output folder with enough space.
- Use a local file. Just Converter is not a URL or YouTube downloader.
Convert the MOV file
-
Add one source
Open Media tools, choose Video tools and use Add media to select the copied MOV file.
You should see: the MOV filename and the video controls for that file.
-
Choose MP4
Select MP4 and review the available video, audio, track, trim and quality controls. Leave unfamiliar options at their suitable starting values.
You should see: MP4 selected as the output format.
Leave Trim start and Trim end empty to keep the full recording. To save only part of it, follow the audio and video trimming guide.
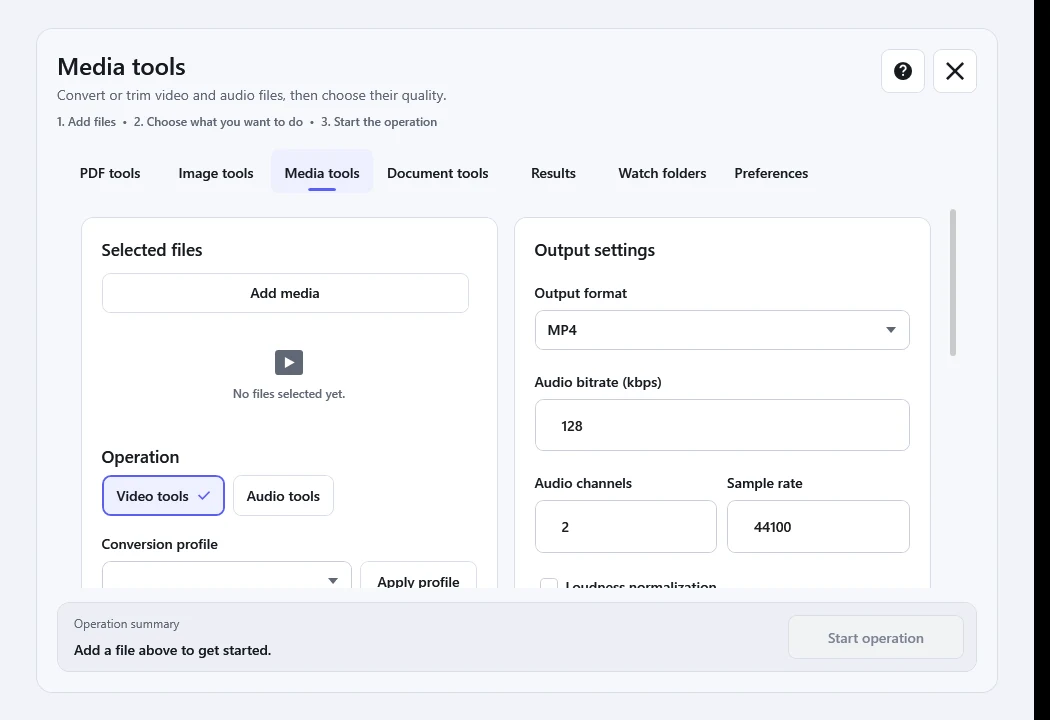
Choose Video tools for a video result, then select MP4. The available controls can change with the file you add. -
Check the conversion plan
Choose a separate output folder and select Start operation. In Review before starting, check the input, format, naming pattern, destination, collision policy and warnings. Resolve any reported unsupported choice.
You should see: a ready result or a warning that names the unsupported choice.
-
Create a separate result
Choose Confirm and start. The app keeps unfinished work separate, then reports whether the file succeeded or failed.
You should see: one completed MP4 in the folder you chose.
Verify the MP4
- For a quick check, play the start, middle and end, and seek to several points. Play important recordings through; samples cannot verify every moment.
- Confirm the intended audio track, language and synchronization.
- Compare duration, orientation, dimensions and visible quality with the MOV.
- Check the measured file size and open the MP4 in its destination app.
Problems and limits
If sound is missing or the wrong language plays, return to track selection. If the file is too large, choose a suitable quality setting and inspect a new copy. In Results, use Retry failed files only when available after correcting the reported problem. For a canceled-only job without that button, select the unfinished file and start a new job.
The main Convert screen applies a 2 GiB video-input limit. Media processing also has a 24-hour duration limit. The app checks update information when it starts, but conversion stays on the PC and the request does not include your source files.